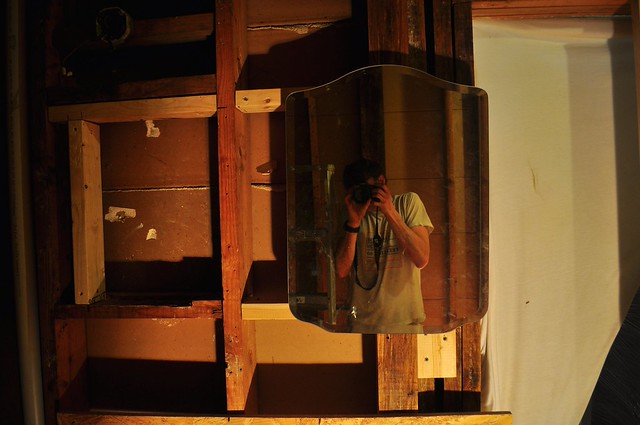
Wired: The Electrical

Friday night I was exhausted: we went from a fully functional bathroom the previous Saturday to a demolished, cleaned, plumbed, sub floored, and framed room in only a handful of days. I was up early again on Saturday, though, to meet one of the nicest guys I’ve had the privilege of knowing. Caleb is the husband of one of Julie’s good friends, and he just so happens to be a sharp electrician.

We met at the house before the world was awake, sipped good coffee, fired up a healthy dose of California rock’n’roll, and re-wired the entire bathroom by the time the neighbors were starting their days. A heartfelt thanks to him for offering his early weekend morning to help us out.

2012-02-11 Bathroom electrical 02

2012-02-11 Bathroom electrical 03

Remnants of the old wiring.

2012-02-11 Bathroom electrical 06

Dear bathroom: meet your new friend, the fan. I think you’ll get along swimmingly.

2012-02-11 Bathroom electrical 07

If you look at the back joist (the ‘lower’ one in the picture) as compared to the top, there’s quite a difference in straightness, and it’s not due to the camera lens. (This actually caused a bit of an issue when hanging drywall in the ceiling, but we’ll cover that later.)

2012-02-11 Bathroom electrical 08

2012-02-11 Bathroom electrical 09

This doesn’t have to do with wiring, but if you look at the joists, you can see shims that I ripped and attached between the top plate of the new wall and the old plaster portion of the ceiling. Drywall is thinner than plaster, and making up the difference is necessary in order to avoid obvious seams or lines on the finished surface. In theory, of course.

Framed: The New Wall

After the plumbing was finished last Monday, my dad and I took to the lumber and framed in the new wall. We gained 12 square feet, which sounds small, but makes a big difference relative to the original footprint.

We were able to get the sticks up in one night, and I spend the next two nights problem solving boxes for medicine cabinets, tie-ins for a shelf, and supports for the wall-hung sink. By Friday night, we had ourselves a completely framed-in room.

2012-02-08 Bathroom framing 07

Old trusty. Wondering what the metal grating is? That’s the heater. For the entire house.

2012-02-08 Bathroom framing 04

If you look at the right side of the photo, you’ll see the dining room door that we are closing off.

2012-02-09 Bathroom framing 02

The finished wall.

2012-02-08 Bathroom framing 02

Boxing in the medicine cabinets.

2012-02-08 Bathroom framing 08

Victory. It was a long week.

Supply and Waste: Plumbing

The dust from broken plaster finally settled and a quick clean-up made the way for water and drainage. My gracious friend Steven (with whom I used to plumb) came over the day after demolition and we roughed-in the supply and waste in one evening.

In order to place and cut the opening for the toilet flange, we installed the first piece of subfloor as well. Seeing the space make progress back towards being an actual room in 36 hours gave us a great sense of accomplishment, and inspiration to keep pushing forward.

2012-02-06 Bathroom plumbing 03

Working quickly can mean leaving quite a trail of mess.

2012-02-06 Bathroom plumbing 04

Steven preparing the opening for the new vent.

2012-02-06 Bathroom plumbing 05

Sink drain (right side of the photo) and the first piece of subfloor.

2012-02-06 Bathroom plumbing 06

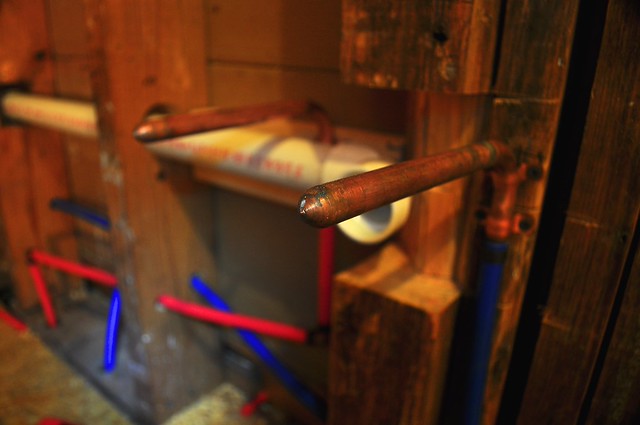
Hot, cold, and copper stub-outs.

2012-02-06 Bathroom plumbing 12

New veins below.

2012-02-06 Bathroom plumbing 13

Gnarled old supply lines.

Demolition

The last 5 days have been quite a blitzkrieg of work. We started demolition on Saturday afternoon and had the entire footprint completely gutted in 24 hours. (For the record, I also taught children’s church on Sunday morning. After the long night of work I didn’t understand anything I said to the kids, and I don’t think they did either.)

A special thanks to Vicky and Matt Hammond for letting us borrow amazing tools of destruction, crushing through plaster, and helping us make quick work of the old cast iron tub with a sledge hammer. Interestingly, “The Hammer” happens to be Matt’s nickname at his job, but we’ll let him tell you that story.

Here are a few pictures of the demolition process. Re-construction is underway, and updates are coming soon.

2012-02-04 Bathroom demolition 01

2012-02-04 Bathroom demolition 03

2012-02-04 Bathroom demolition 04

We plan to re-use this same door jamb, so we were careful when prying it out.

<a title="22012-02-04 Bathroom demolition 05

It was time.

2012-02-04 Bathroom demolition 06

2012-02-04 Bathroom demolition 07

2012-02-04 Bathroom demolition 09

2012-02-04 Bathroom demolition 11

We found several layers of beautiful linoleum. Ahem.

2012-02-04 Bathroom demolition 13

One slight tug on the channel locks and the drain crumbled like a hollywood marriage.

2012-02-04 Bathroom demolition 15

Still looks small.

2012-02-04 Bathroom demolition 17

With a bit of careful prying, the existing tile came loose in clean, carry-able sheets.

2012-02-04 Bathroom demolition 21

My beautiful fiancé showing no mercy.

2012-02-04 Bathroom demolition 23

2012-02-04 Bathroom demolition 28

2012-02-04 Bathroom demolition 29

2012-02-05 Bathroom demolition 02

From the left: The Hammer, Vicky, Julie

2012-02-05 Bathroom demolition 05

Cleaning up.

2012-02-05 Bathroom demolition 06

2012-02-05 Bathroom demolition 08

2012-02-05 Bathroom demolition 17

2012-02-05 Bathroom demolition 15

2012-02-05 Bathroom demolition 19

2012-02-04 Bathroom demolition 32

Hardcore.

2012-02-04 Bathroom demolition 33

Cute with a crowbar.

The Bathroom: Before

Here are pictures of the bathroom before the storm.

2012-01-29 Bathroom remodel before 01

I removed casing from the window to take measurements for a new one.

2012-01-29 Bathroom remodel before 02

2012-01-29 Bathroom remodel before 04

An extra couple of feet will make a big difference, but it”s still going to be a tiny bathroom.

<a href="https://www.flickr.com/photos/ericdodds/12946670413/&quot; title="2012-01-29 Bathroom remodel before 07 by online casino ericdodds, on Flickr”>2012-01-29 Bathroom remodel before 07

This is the original 1949 cast iron sink.

2012-01-29 Bathroom remodel before 09

No moisture issues here…

2012-01-29 Bathroom remodel before 10

Looks like a pretty bad spot. How bad?

2012-01-29 Bathroom remodel before 13

You can see through to the crawl space when the lights below are on. Yikes.

Next up: demolition.

The Long List: Materials

Here are pictures of me and my dad loading materials after a careful and lengthy shopping spree.

A heartfelt thanks to:

  • Our families for giving us so many Lowes and Home Depot gift cards over the holidays
  • Julie”s parents for the use of Desert Storm, their long bed Ford pickup truck
  • Victor Berg for offering much needed guidance on the long materials list
  • My dad for helping me load up at Home Depot
  • James Pickens and Rick Harris for helping me unload the materials into the shed late at night. Moisture resistant sheetrock isn”t light.

<a href="http://www.flickr.com/photos/ericdodds/12833184444/&quot; title="2012-02-03 Bathroom remodel materials 06 by online casino ericdodds, on Flickr”>2012-02-03 Bathroom remodel materials 06

2012-02-03 Bathroom remodel materials 08

2012-01-31 Bathroom remodel materials 01

2012-01-31 Bathroom remodel materials 03

Heavier Iron: The Cast Iron Sink

The story behind the sink is much the same as the story behind the bathtub, so I’ll spend a little less time telling it.

Browsing through innumerable sink options again left us desiring vintage-inspired items that were far outside of our budget. We turned our attention to both eBay and Craigslist in search of affordable substitutes. And again, the ever-thrifty Julie found a marvelous wall-hung, cast-iron farm sink in great condition.

We couldn’t make as quick a trip to secure the purchase as we did with the tub, and actually had to wait for another possible buyer to look at the item before we did. Thankfully, the other people didn’t show, and we were able to coordinate with friends in the area (about an hour away) to pick the sink up for us. (Many thanks are due to Dr. and Mrs. Champ – we owe you wine on our next trip to Grits and Groceries.)

The cast iron on the sink was in much better condition to be refinished: hardly any scraping was in order, and a quick trip around the surface with a sanding disc did the trick. I had the unit sanded, painted, and ready to be hung in a matter of days. Surprisingly, the size-to-weight ratio of the sink seems to be much, much higher than it is with the tub – it’s extremely difficult for one person to move it alone.

2012-01-20 Bathroom sink strip and prep 01

2012-01-20 Bathroom sink strip and prep 03

2012-01-20 Bathroom sink strip and prep 04

2012-01-20 Bathroom sink strip and prep 05

2012-01-21 Bathroom sink strip and prep 01

2012-01-21 Bathroom sink strip and prep 02

2012-02-03 Bathroom sink strip and prep 01

2012-02-03 Bathroom sink strip and prep 04

There is one neat point of interest relating to the manufacturer of the sink.

A week or two before, in the process of cleaning the tub, I noticed that the date of production was in the year 1929, and the manufacturer was listed as “Standard Sanitary Manufacturing Company” of Louisville, KY (picture here).

In cleaning the sink I noticed a similar set of information cast, with the year being 1949 and the manufacturer “American Radiator and Standard Sanitary Corporation”. I acted on my nerdy tendencies and looked up the history of the company known today as American Standard:

Before American Standard, there was the Standard Sanitary Manufacturing Company. It was founded in 1875, and merged with several other small plumbing manufacturers in 1899 to form the Standard Sanitary Manufacturing Company. Standard Sanitary pioneered many of the plumbing product improvements introduced in the early part of this century including the one-piece toilet, built-in tubs, combination faucets (which mix hot and cold water to deliver tempered water) and tarnish-proof, corrosion-proof chrome finishes for brass fittings. By 1929, Standard had become the world’s largest producer of luxurious bathroom fixtures.

That same year, the Standard Sanitary Corporation merged with American Radiator Company to form the American Radiator and Standard Sanitary Corporation. The corporation adopted the name “American Standard” in 1967.

(from the American Standard website)

2012-01-20 Bathroom sink strip and prep 02

Even though it was a small coincidence, I was delighted to discover that both our bathtub and sink were produced in the same factory. But my curiosity didn’t stop there – I remembered at one point seeing a ‘Standard’ logo on the drain of the original cast iron sink still in the bathroom.

I crawled underneath to find names and dates, and again discovered a coincidence: the unit was produced by the American Radiator and Standard Sanitary Corporation in the year 1949. In the same month, June. In fact, the ‘new’ sink is only 30 days older than the ‘old’ one.

Out with the old, and in with the same old.

2012-02-03 Bathroom sink strip and prep 03

The original cast iron sink: 6.1.49

2012-01-20 Bathroom sink strip and prep 01 - Version 2

The new cast iron sink: 6.30.49

Heavy Iron: The Claw Foot Bathtub

Many times I prefer old things to new things. I appreciate the character of something used and built to last, and I enjoy the vintage aesthetic. Naturally, when the idea of a claw foot tub came up in our initial design scheming, I started salivating.

My dreams were soon crushed after a short exploration of cost. New tubs were out of the question, most used tubs needed their porcelain interiors re-finished, and finding one with a good faucet and shower curtain assembly seemed an impossibly rare discovery. (The curtain assemblies alone are surprisingly spendy.) We canned the idea and started planning for a more traditional installed tub / tiled shower.

And then, all of a sudden, Julie happened to make an extremely rare discovery on Craigslist. A claw foot tub, complete with faucet and curtain assembly, for a fire-sale price. I called the seller and we drove to Hendersonville the same day to see it for ourselves. For being almost 90 years old, the porcelain finish was in amazing condition. We gave the lady a deposit and I returned the next night with a truck to take it home.

The tub has a long, unknown history of helping people bathe themselves, and that heritage came with many thick layers of cracking and peeling paint. We counted at least 4 colors, including pink, blue, mint green, and white. A fresh coat was in order, so we took to the Depot to stock the stripping and painting armory.

The rest is thankfully history, one including long hours of scraping, sanding, wire-cup-brushing, scrubbing, prepping, priming, and painting. (Scroll to the bottom of the post for a few lessons we learned and our materials list.)

And now, enjoy a few pictures of the transformation.

2012-01-09 Clawfoot bathtub strip and prep 01

2012-01-09 Clawfoot bathtub strip and prep 02

2012-01-09 Clawfoot bathtub strip and prep 04

2012-01-09 Clawfoot bathtub strip and prep 06

2012-01-09 Clawfoot bathtub strip and prep 07

Full disclosure for the overly-regulatory type: I currently work for Liquid Wrench through my employer, Brains on Fire. I took this can from a bunch of samples they gave our team. They didn’t give me money to post this. If they had, I would have taken it and paid someone to sandblast the tub.

2012-01-09 Clawfoot bathtub strip and prep 08

2012-01-09 Clawfoot bathtub strip and prep 09

2012-01-09 Clawfoot bathtub strip and prep 10

2012-01-09 Clawfoot bathtub strip and prep 11>

2012-01-09 Clawfoot bathtub strip and prep 12

2012-01-10 Clawfoot bathtub strip and prep 05

2012-01-13 Clawfoot bathtub strip and prep 03

2012-01-13 Clawfoot bathtub strip and prep 04

2012-01-13 Clawfoot bathtub strip and prep 05

2012-01-16 Clawfoot bathtub strip and prep 02

——

2012-01-16 Clawfoot bathtub strip and prep 04

2012-01-16 Clawfoot bathtub strip and prep 05

2012-01-14 Clawfoot bathtub strip and prep 01

2012-01-14 Clawfoot bathtub strip and prep 02

2012-01-20 Clawfoot bathtub strip and prep 02

2012-01-26 Clawfoot bathtub strip and prep 01

2012-01-26 Clawfoot bathtub strip and prep 02

2012-01-26 Clawfoot bathtub strip and prep 03

2012-01-26 Clawfoot bathtub strip and prep 04

2012-01-26 Clawfoot bathtub strip and prep 06

These were my friends:

2012-01-13 Clawfoot bathtub strip and prep 01

2012-01-13 Clawfoot bathtub strip and prep 02

Lessons:

  • Get powered sanding equipment. Scrapers are great for the first round of removal after stripper has been applied, but a drill and oscillating multi tools will save you sore arms and a whole lotta time.
  • Our friend Loyd in the paint department at Home Depot confirmed that it’s important to get down to actual metal for the primer and paint to take (if you want the longest lasting finish). We used his recommended metal stripping / paint preparation chemical, and it made a significant (visible) difference in cleaning the surface.

What we used:

  • Paint stripper for use on metal applications (We used almost two quarts to do the tub – there were multiple coats of paint)
  • 5-in-1 painter’s tools (for scraping)
  • A wire cup brush for use in a drill (like this) – it was the hardest working tool on the project
  • Some sort of really abrasive sanding disk for use in a drill (for some extra grinding power on the thick spots)
  • Oscillating multi-tool with the triangular sanding attachment (awesome)
  • Rust-Oleum rust-preventative primer – oil based
  • Rust-Oleum white semi-gloss multi-purpose paint – oil based
  • Nights
  • Weekends
  • Sweat
  • Bubblegum
  • Celebratory gyro sandwiches

Hello, friend.

My lovely fiancé and I are working hard to remodel a bathroom in our little mill house before we get married in April. This weblog is where I will post possibly infrequent, and probably succinct, updates on our progress. Friends and family, we online casino can’t wait to have you over this summer.

My name is Eric Dodds. I live in South Carolina. I don’t have much facial hair, I enjoy strong coffee, and I’m glad you stopped by to check in on the re-modeling progress. You can learn more about me here, or send me a message via email.